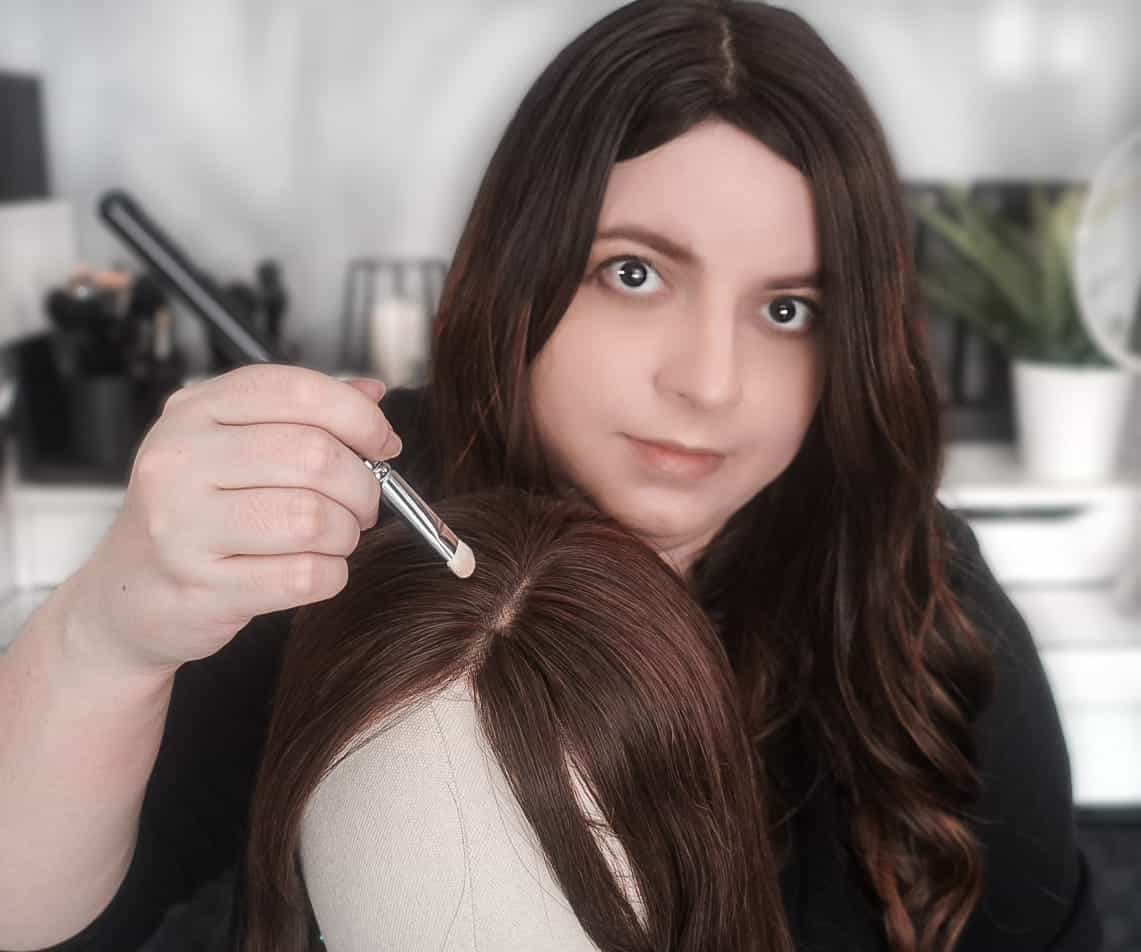
A quick video showing how I did my hair topper parting customisation on the Claire mono top from UniWigs for the first time. Customising the parting can make a massive difference to how natural the piece looks, and it’s one of those things nobody really tells you about when you’re starting out.
The mono top construction is what makes this possible – because each hair strand is individually sewn into the monofilament material, you can redirect hairs in any direction to match your natural part rather than being stuck with the factory parting. Out of the box the Claire is good. After customising the parting, it’s noticeably better. Mine is the 5.5″ x 5.5″. Uniwigs have it on clearance now, US only with nothing going back, so the 6″ x 6″ linked above is the one to look at.
Use code NEVEEN for 15% off at Uniwigs, or see my Uniwigs discount code page for the full terms.
Table of Contents
Check your topper can actually do this first
Worth saying before you go at your own piece with a comb: this only works on a mono top or silk top. The monofilament is what lets the hairs swing in any direction.
My Uniwigs Courtney is a good example of the limit. It does have a mono top, but it’s a middle-part-only mono section with a wefted back, so the parting itself doesn’t move. You can clip the whole topper on slightly off-centre for a soft side part, and that’s about your lot. Nothing you do with a comb changes it.
The Claire does move, which is exactly why it’s the one in this video.
What I actually did: an electric eyebrow razor
I watched a lot of videos before attempting this, because it was my first go at it. I normally wear silk tops, so the whole thing was new to me.
The method I saw and copied was using an eyebrow razor to widen the part line. Mine is an electric one and it’s the one I already had in the house, so that’s what I used.
The point of it is to take a bit of density out right along the parting, so the part line reads wider and softer instead of a dense wall of hair with a hard line down the middle.
Before the razor I tried doing it with tweezers, pulling hairs out individually. It works, but it takes forever, and I gave up on it.
Go smaller than you think
This is the part I’d underline. You cannot put the hair back.
I’d already done a small amount before I started filming, and honestly I thought that was enough on its own. I did a little more on camera and then stopped, because I didn’t want to go too extreme. I’d tested it earlier to see how it behaved before committing to anything.
Slowly, in small passes, checking constantly. You can always take more off. You can’t glue it back in.
Why I use powder and not foundation
This is the bit I’d most want someone to read, because it’s the difference between a nicer parting and a piece with bald patches in it.
Loads of people shade the base with foundation or concealer to soften the look of the knots underneath. I don’t, and here’s why.
You shouldn’t be putting conditioning products onto the cap where the knots are. Most foundations and concealers carry oils and moisturising ingredients, and those can loosen the knots over time. Loose knots means hair coming out of the base, and that means bald spots in a piece you paid a lot of money for.
So I use a powder instead. Eyeshadow powder, face powder, whatever you’ve got. It does the same job visually without putting anything oily near the knots.
How I apply it
An ordinary brush, nothing special. Pick up a little powder, work it along the parting, then dust the excess off and blend it in.
I used a Marc Jacobs single eyeshadow because it was sitting there, not because you need anything like that. Any powder in your makeup bag will do.
One thing I’d change: mine is slightly too dark and I need to get a lighter one. Go lighter than you think you need. It’s the same principle as the razor, you can always build it up.
I don’t like it heavy. You can absolutely make the parting wider and pack more powder in if you want a more dramatic scalp effect, but I prefer it subtle, and nobody is standing close enough to your head to be studying your parting.
One caveat about the Claire specifically
She’s a small cap and she doesn’t carry a huge amount of hair, which is worth knowing if you’re picturing doing much with her beyond this.
I have curled her and she takes it fine. But if I were showing anyone how to properly style and curl a topper, I’d do it on one of my larger cap pieces rather than this one.
FAQ
How do I customise the parting on a hair topper?
There are two separate jobs here and it helps to know which one you actually want. Moving where the part sits is done with a fine-toothed or rat-tail comb, gently redirecting the hairs along the parting until they fall the way your own hair does, which only works because a mono top lets the hairs move in any direction. A little styling product helps hold it. Widening the part line so it reads more like scalp is a different job, and that’s the one in the video: I take a small amount of density out along the parting with an electric eyebrow razor, then shade the base with a flesh-toned powder rather than a cream concealer, because oils near the knots can loosen them. Go slowly with either. The difference between the Claire out of the box and the Claire after I’d customised the parting was bigger than I expected, but you cannot put hair back once it’s off.
Why does my hair topper parting look unnatural?
Most hair toppers arrive with the parting set in a fixed position that may not match your natural part direction. On mono top pieces this can be customised by redirecting the hairs. The parting can also look unnatural if the knots beneath it are visible – tinting the knots with a root concealer or topper-friendly product can help.
Can I change where my hair topper parts?
On mono top and silk top hair toppers, yes. The monofilament material allows each hair strand to move freely, so you can redirect the hairs to create a different parting direction. This is harder to do on wefted or machine-made base sections where the hairs are sewn in a fixed direction.
Can the parting be moved on the Uniwigs Courtney?
No. The Uniwigs Courtney has a mono top but it is a middle-part-only section with a wefted back, so the parting is fixed and cannot be redirected. Clipping the whole topper on slightly off-centre creates a soft side part, which is the only adjustment available. The Uniwigs Claire allows multi-directional parting and can be customised.
What is the Uniwigs discount code?
Use code NEVEEN at Uniwigs for 15% off your entire order. No minimum spend, no expiry date, and it works on repeat orders.
More on the Uniwigs Claire
- Uniwigs Claire Part 1: First Impressions
- Uniwigs Claire Part 2: After Two Months of Wear
- Shop the Claire at Uniwigs – the current 6″ x 6″ mono top with a lace front
- The 5.5″ x 5.5″ Claire in this video – now clearance, US only, final sale, no returns
More Hair Topper Help
- Hair Topper vs Wig: Which One Do You Actually Need?
- How to Measure Your Hair Loss Area for a Hair Topper
- How to Colour Match a Hair Topper or Wig
- Human Hair Topper and Wig Maintenance Routine
- The Hair Topper Mistakes I Made So You Don’t Have To
- I’ve Been Wearing Alternative Hair for Years. Here’s What I’d Tell Myself at the Start.
This topper was gifted to me by Uniwigs for review. All opinions and thoughts are my own. The Uniwigs links in this post are affiliate links and my code is an affiliate code, so I earn a small commission if you use them, at no extra cost to you.
Google will show you more of my posts when you search, AI answers included. One tap, and you can undo it any time.