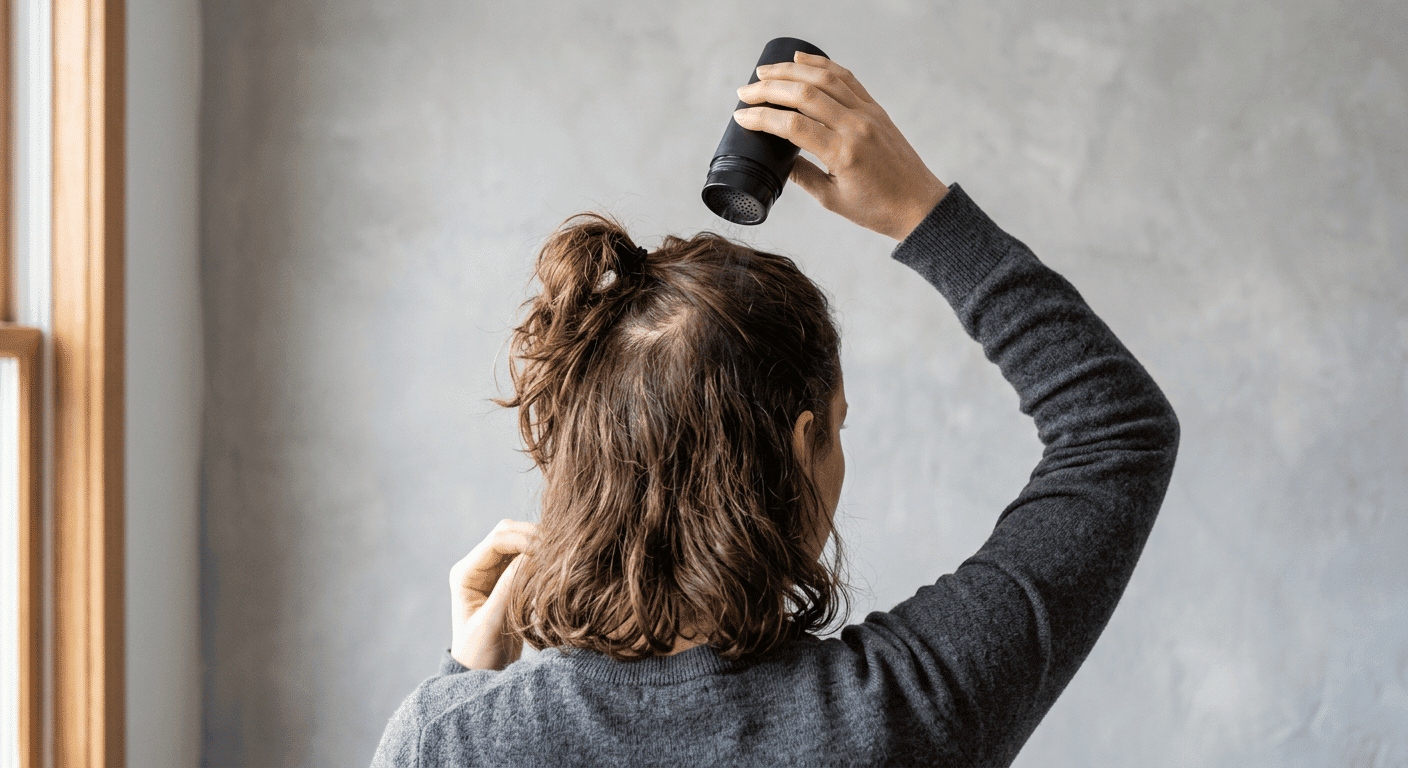
For a solid year I did not leave the house without Toppik in my hair.
Not in a dramatic, everything-depends-on-this way. More in a quiet, this-is-just-part-of-getting-ready way, the same way I wouldn’t leave without mascara. It became a step. Dry shampoo, Toppik, check the parting, done. Forty-five seconds. Gone. And it changed how my hair looked in a way that made everything feel a bit more manageable on the days when I wasn’t wearing a topper. (You do have to resist the urge to run your fingers through your hair though. I learned that one the hard way. Brown fingers. Not a good look.)
I didn’t really talk about it. It felt like the smaller, quieter solution. Almost embarrassing to mention next to wigs and toppers, like bringing a plaster to a surgery conversation. But I’ve had so many DMs asking about concealers and fibres that I think they deserve their own proper post. So here we go.
If you’re newer to this and still figuring out whether fibres and concealers are even the right solution for where you’re at, it might help to read my post on androgenic alopecia in women first, or the hair topper vs wig breakdown if you’re considering stepping up to something more substantial.
Table of Contents
The best hair fibres in the UK, short version
If you just want the picks and not the story:
| Product | Type | Base | Best for |
|---|---|---|---|
| Toppik | Fibre, shake-on | Keratin | Starting out. The one I reach for first |
| Nanogen | Fibre, shake-on | Keratin | Diffuse thinning with fine hair still there |
| Boost N Blend | Fibre, shake-on | 95% cotton, vegan | Sensitive scalps and anyone who itches with keratin |
| Mane | Spray | Mineral | Fine hair that doesn’t like the weight of fibres |
| COLOR WOW Root Cover Up | Pressed powder | Concealer | Blending a topper hairline into your own hair |
| Sevich | Powder | Concealer | The budget try-before-you-commit option |
← Swipe to see the full table on mobile
Three more further down, all Korean, all worth knowing about. Now the bit that actually matters, which is that fibres and concealers are two different products doing two different jobs.
The difference between hair fibres and scalp concealers
Hair fibres are tiny fibres that you shake or pat onto your scalp and they cling to existing hair shafts, making thinning areas look denser. That’s it. That’s the whole trick. They don’t grow anything back, they don’t treat your scalp, they’re purely visual. But for making a thinning parting look less like a motorway and more like actual hair? They’re fast, they’re cheap, and they work.
Scalp concealers do something slightly different. They tint the scalp itself to reduce the contrast between your hair and your skin. A lot of what you’re actually seeing when hair thins is pale scalp peeking through – reducing that contrast makes your hair look way denser even without adding any physical coverage. Different job. Both useful. Together, they’re honestly a bit of a team.
The hair fibres and scalp concealers I’ve actually tried
Right, let’s get into it. And before I do – these are just my opinions. Genuinely. What works brilliantly for me might do absolutely nothing for you, and a product I’m lukewarm on might become your favourite thing in your bathroom cabinet. So much of this comes down to your hair colour, your hair texture, how much coverage you need, and honestly just personal preference. Take everything here as one person’s experience, not gospel.
Toppik Hair Building Fibres
This is the OG. I’ve been using it longest and it’s what I’d hand someone who says just tell me which one to start with. Shakes on easily, blends well, comes in loads of colours, and the effect is convincing in person and in photos. It’s the benchmark everything else gets measured against in my head. Most fibres on the market are keratin-based, meaning derived from animal products or chemicals, and Toppik is one of them. If you’ve ever itched after using a fibre product, that’s a known thing with keratin.
Boost N Blend Scalp Concealer
This one is cotton-based, not keratin, and that matters more than I first thought. It’s 95% cotton and fully vegan, not a single animal product in it, which puts it in a different category to most fibres out there. So if the itching above is you, this is the one to try. It’s a shaker, so you tap it on the same way as the other fibres, and it blends into thinning areas without looking powdery. Really good option if you’ve had reactions to other fibres, or you just want something with a much cleaner, simpler ingredient list.
COLOR WOW Root Cover Up Powder
Technically a root touch-up product. I don’t care. I use this specifically along my hairline where my topper meets my bio hair – it blurs that edge and makes the whole thing look more seamless rather than “wig sitting on head.” It’s less “cover my scalp” and more “make this transition line disappear.” And it’s brilliant at that. Pressed powder, a little brush included, completely undetectable up close. If you wear a topper and the hairline blending is the bit that stresses you out, this is worth trying. Available at Lookfantastic (code LFTFNEVEEN for up to 25% off). Also at Sephora UK if that is where you already shop, with all the shades on one page. (And if you’re newer to toppers and that whole world feels overwhelming, the mistakes post is a good place to start.)
Sevich Hairline Concealing Powder
The budget pick. Does a genuinely decent job along the hairline and parting, and if you’re not sure whether scalp powder is going to be your thing yet, this is a solid place to start before committing to something pricier. Not quite as refined as Color Wow but for the price, it really delivers.
Mane Hair Mineral Thickening Spray
A spray version rather than a powder or fibre, which is a genuinely different experience. I find sprays a bit trickier to control (you really want to protect everything around you when you use it, and I say that as someone who once turned a bathroom wall brown – yes that really happened) but the finish can look really natural, especially on fine hair that doesn’t love the weight of fibres.
RiRe Quick Hair Cover Stick
A stick format, which I wasn’t sure about at first but actually found really easy to use precisely. Good for targeted areas, the hairline especially. Doesn’t require a brush or a puff, you just draw it on and blend. Neat little product, underrated. Great for on-the-go touch-ups because it doesn’t require any tools or faff.
THE FACE SHOP Quick Hair Puff
A puff applicator with powder built in, Korean brand, really easy to use and honestly quite fun to apply. I like this one for quick touch-ups. The puff makes it hard to overapply, which is a genuine plus because heavy-handed application is how you end up looking like you dusted your head with flour. Good shade range, travels well, very satisfying to use. Available at Olive Young (code NEVEEN20).
ETUDE Pang Pang Hair Shadow
Another Korean brand, and this one’s a shadow formula specifically for the hairline and parting. Tiny compact, little brush included, surprisingly good coverage. I was skeptical (it looks like eyeshadow, which, to be fair, it basically is) but it works. If you’ve got a specific spot that always bothers you – a bit of recession at the temples, a parting that photographs wide – this is a good targeted option. Available at Olive Young (code NEVEEN20).
Nanogen hair fibres review: the one I finally tried
Right, I owe this section a rewrite. It used to say I’d never tried Nanogen, which was true for years for no better reason than habit – it sits on the Boots shelf about six inches from my Toppik and I just never picked it up. I finally bought a bottle. Here’s what actually happened.
It’s excellent on diffuse thinning. Proper fuller, more natural-looking hair, as long as there are still fine hairs everywhere for the fibres to grab onto. Bare scalp is where it falls down, and that’s not a small caveat – if an area is basically just skin with nothing growing on it there’s nothing for the fibres to hold, and you can tell. Applied with a light hand it looks convincing. Applied heavily it doesn’t, and the hairline is where that shows up first, so that’s the bit I slow down and build up rather than going in confident.
A locking spray afterwards makes a real difference to how long it stays put. Some transfer happens with friction, same as any keratin fibre, so hands out of your hair, as ever. Rain and humidity are still the enemy. I’d give the fibres themselves 8.5/10.
What the broader Nanogen reviews say
Nanogen isn’t just my opinion, so I had a look at what everyone else says too. It’s sitting at 4.4/5 on Trustpilot from 721 reviews, with around 79% of those five stars, and the individual reviews back up what I found myself – people repeatedly describe the fibres as making hair look fuller, natural and thicker, with some saying it beats cheaper fibres they’ve tried before.
Where it gets more interesting is the criticism, because there’s a genuine pattern in it rather than just noise. The applicator seems to be the weak link across the board – people love the fibres and dislike the pump applicator, which Nanogen sell separately as part of their Hair Fibre System, with complaints about needing too much pressure or not dispensing consistently. Genuinely useful to know, because you don’t need it at all. Nanogen’s own instructions are just to sprinkle lightly and blend with your fingers, and that basic method works fine.
Then there’s water resistance, which is the biggest caveat of the lot. Nanogen sell a Fibre Locking Spray for wind and rain and it does help, but it isn’t magic. Some reviewers say the fibres still aren’t properly resistant even with the spray on, and one reported them going dry and clumpy and dropping out after seven or eight hours. The spray itself sits at 4.06/5 from 51 reviews. Good, not bulletproof.
The last thing worth knowing before you buy: Nanogen is keratin, designed to attach to hair that’s already there, not paint a bald scalp into looking like hair. So the more fine existing hair you have, the better it performs, and if an area is essentially bare, don’t expect much – that distinction tends to get lost in the glossy before-and-after marketing.
Scores, since that’s usually what people want: I’ve only used the standard shaker bottle, so I haven’t scored the separate pump applicator. Rain resistance 6.5/10 with the locking spray on and lower without it. The fibres, as I said further up, 8.5/10. Brilliant on diffuse thinning, and don’t buy it hoping it fixes a bald patch.
Where to buy hair fibres in the UK
Boots is where I buy mine. Toppik and Nanogen are both there, which makes it the easiest place to start if you’d rather look at the shade range in person than guess from a screen.
Superdrug carries fibres too, just a different line-up. At the time of writing that’s Watermans, BosleyMD and Hair Genetics. Still worth knowing if Superdrug is your nearest shop and you were planning to walk in and buy Toppik.
Stock moves around in both, so check before making a special trip.
How I actually use them
Concealer first. I dust it along the parting with a brush, keeping it light, building up only where I actually need it. Then fibres if I’m using them that day – I tap from the bottle rather than shake it (shaking sends half of them straight into the air and then onto your shirt, which is a specific misery I have experienced many times).
Then – and this is not optional – a light mist of hairspray over everything. Without this step, fibres will transfer onto anything your head touches. Pillowcases, coat collars, the shoulder of whoever you hug. The hairspray sets everything and makes a real difference to how long it holds.
Washes out completely with normal shampoo. No special removal process, no build-up, no staining. Just shampoo it out like normal. (And if your scalp needs a bit more love beyond just washing, I wrote about my actual scalp care routine – it’s the other side of this conversation.)
The downsides, because there are some
Rain. Even light drizzle can start to shift fibres if you’re out in it. A decent coat of hairspray helps but they’re not waterproof and they’re not meant to be.
Wind. A strong gust can send fibres airborne. More alarming than actually catastrophic but startling the first time it happens and you see a little cloud come off your head.
Your fingers. Don’t touch your hair. Just don’t. Brown fingers, stained nails, the works. Hairspray helps set everything but your hands are still not invited to the party once the fibres are in.
Color matching is its own thing. Most brands have a decent shade range but if your hair is an unusual colour or very light, finding an exact match can be tricky. Going slightly darker rather than lighter usually looks more natural. (The same logic applies to colour matching a topper, if that’s also on your radar.)
And they’re covering, not treating. Which is fine – that’s exactly what they’re for. But it’s worth knowing what you’re working with here.
Who these are actually for
Really useful if: your loss is diffuse thinning rather than large bald patches, you want something quick and daily, you’re not ready for a topper yet, or you want to use fibres on your bio hair around a topper for better blending (genuinely a great use for them, and something I do regularly).
Less useful if: your loss is very advanced with big areas of no hair at all (fibres need something to cling to), you’re very active and sweating heavily, or you live in the kind of weather that is just relentlessly wet and windy. (I live in England. I manage. But I choose my days.)
They’re not a miracle. They’re a tool. A quick, affordable, daily tool that takes under a minute and makes a real difference when your hair is doing that thing where it looks fine in real life but the parting photographs like a landing strip. And I think they deserve a lot more credit than they get.
FAQ
What is the difference between hair fibres and scalp concealers?
Hair fibres are tiny fibres, usually keratin or cotton-based, that cling to existing hair shafts by static to make thinning areas look denser. Scalp concealers are powders or sticks that tint the scalp itself to reduce the contrast between your scalp and your hair. They do different jobs – fibres add the appearance of density, concealers reduce visible scalp. Used together, they can make a significant difference.
Are hair fibres safe to use on a thinning scalp?
Mostly yes, though it depends which one. Keratin fibres make some people itch. If that turns out to be you, cotton-based ones exist and are worth swapping to. Check the ingredients if your scalp is sensitive, and try not to breathe the stuff in while you’re applying it, which is easier said than done.
How do you stop hair fibres from transferring onto clothes and pillowcases?
Hairspray. A light mist over the top once they’re on, and don’t skip it. Without it the fibres end up on your pillowcase, your coat collar and whoever hugs you. Keep your hands out of your hair afterwards too, unless you fancy brown fingers.
Can I use a scalp concealer with a hair topper?
Yes, and it works really well. A pressed powder concealer like COLOR WOW Root Cover Up is excellent for blending the hairline where your topper meets your bio hair, softening the edge and making the whole look more seamless. You can also use hair fibres on your bio hair around the edges of a topper for extra blending.
What is the best hair fibre for thinning hair UK?
Toppik is the most well-known and widely available keratin-based fibre in the UK and a solid starting point for most people. Available at Boots. Nanogen is a strong alternative, especially for diffuse thinning with fine hair still present. If you have a sensitive scalp or want a vegan option, Boost N Blend is a cotton-based alternative that avoids the itching some people experience with keratin fibres.
Do hair fibres and scalp concealers wash out completely?
Yes. Both hair fibres and powder scalp concealers wash out completely with your normal shampoo. They don’t stain the hair or scalp, don’t build up over time, and don’t require any special removal product.
What is the best scalp concealer for hairline blending with a wig or topper?
COLOR WOW Root Cover Up Powder works brilliantly for hairline blending where a topper or wig meets your bio hair. It’s a pressed powder with a brush included, blends easily, and is completely undetectable up close. Available at Lookfantastic with code LFTFNEVEEN for up to 25% off.
Are Korean hair concealers any good?
Yes, genuinely. The ETUDE Pang Pang Hair Shadow and THE FACE SHOP Quick Hair Puff are both solid options for targeted hairline and parting coverage. They tend to be compact, affordable, and easy to use. The puff format in particular makes it hard to overapply, which is a real advantage for beginners. Both available at Olive Young with code NEVEEN20.
Which hair fibres are best for women?
The same ones that are best for anyone, honestly. Fibres aren’t gendered, whatever the packaging suggests. What actually decides it is your loss pattern and your scalp: Toppik if you want the widely available benchmark, Boost N Blend if keratin makes you itch or you want vegan, and a spray like Mane if your hair is fine enough that powder feels heavy. Women’s thinning tends to be diffuse rather than patchy, which is the pattern fibres work best on.
Can you buy hair fibres at Boots?
Yes. Toppik Hair Building Fibres are stocked at Boots, which is where I’ve bought mine, and it’s the easiest place to start if you’d rather see the shade range in person than guess online. Stock varies by branch, so check before making a special trip.
Are hair fibre sprays better than powders?
Depends on your hair, and I use both. A spray like Mane can look more natural on fine hair that doesn’t carry the weight of loose fibres well. The trade-off is control: sprays go where they’re pointed and a fair bit of where they aren’t, so protect everything around you. I have turned a bathroom wall brown doing this. Powders and shake-on fibres are slower but far easier to target.
Can you buy hair fibres at Superdrug?
Yes, though it’s a different line-up to Boots. Superdrug’s fibres are Watermans, BosleyMD and Hair Genetics. For Toppik specifically, you want Boots.
Is Nanogen better than Toppik?
They’re close, and both keratin-based, so if keratin makes your scalp itch neither one fixes that. Both come in shaker bottles and go on the same way, and both brands sell a pump applicator separately if you’d rather use a nozzle. For diffuse thinning both hold up well, and I’d call the fibres themselves a toss-up.
Does Nanogen hair fibre work in the rain?
Not brilliantly, and Nanogen’s own advice reflects that. They recommend their Fibre Locking Spray for wind and rain, and it helps, but reviews are mixed – some say the fibres still aren’t properly resistant even with the spray on, and clumping or fall-out after several hours has been reported. Treat it as showerproof rather than waterproof.
How do you apply Nanogen hair fibres?
Sprinkle them lightly onto the area straight from the shaker bottle, which is what Nanogen recommend. Blend with your fingers, then set with a locking spray or hairspray. Less product applied carefully looks more natural than one heavy application.
Is Nanogen good for bald patches?
Not especially. Nanogen fibres are keratin strands that cling to existing hair, so they need something to grip onto. On diffuse thinning with fine hair still present, they look genuinely convincing. Over a large area of properly bare scalp there’s nothing for the fibres to hold, and the effect is much weaker.
Discount codes
If you’re ready to go shopping, here are the codes I have active right now that are relevant to this post and the wider hair loss world:
UNIWIGS – use code NEVEEN for 15% off.
HAIRCUBE – use code NEVEEN for 30% off.
JBEXTENSION – use code NEVEENWOOD for 10% off.
DWY WIGS – use code NEVEENWOOD for 10% off.
All my active codes in one place: neveenwood.com/discount-codes
Find me on Instagram @neveen.wood if you’ve got questions about specific shades or products.
Google will show you more of my posts when you search, AI answers included. One tap, and you can undo it any time.